Build a Simple Garden Shed: Plans and Tips

Building a garden shed can be a rewarding project for any homeowner looking to expand their outdoor space and storage capacity. Whether you’re an avid gardener or simply need a place to stow away tools and equipment, a well-built shed can transform your backyard into a functional and organized haven. So, roll up your sleeves and get ready to embark on this DIY adventure!

First things first, you’ll need a solid plan. Start by measuring the available space in your garden and deciding on the shed’s size. Consider the purpose of the shed: will it be primarily for storing gardening tools, or do you envision it as a cozy retreat for potting plants and enjoying a quiet cup of tea? Your intended use will dictate the shed’s layout and features.
– A simple 6×8 feet shed is a great starting point for beginners and offers ample storage space. However, if you’re feeling ambitious and have the room, you can opt for a larger design.

When it comes to materials, wood is a popular choice for its natural beauty and ease of construction. Consider using pressure-treated lumber to ensure durability and resistance to rot. Alternatively, if you prefer a low-maintenance option, vinyl or metal sheds are excellent choices, offering long-lasting performance with minimal upkeep.

Here’s a basic plan to get you started: Begin with a sturdy foundation, such as a concrete slab or pressure-treated wood skids. Construct the frame using 2×4 lumber, ensuring it’s square and level. Add wall panels, a roof, and windows, then finish with roofing material and any desired paint or stain.

Pay attention to local building codes and regulations to ensure your shed meets safety standards. Permits may be required for certain sizes and structures, so be sure to check with your local authorities before you begin construction.

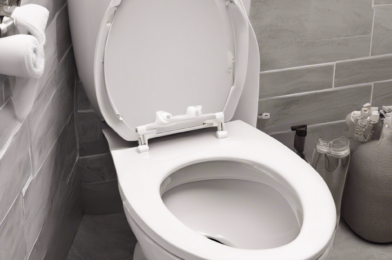
How to Fix a Running Toilet in 30 Minutes

Toilets are a modern convenience that we often take for mind—that is, until they malfunction. A running toilet is a common household issue that not only irritates but also wastes water and bloats your utility bills. Don’t let this problem persist! With just a few simple tools and a bit of elbow grease, you can fix a running toilet in 30 minutes or less, even if you’re not particularly handy.

First, don your DIY cap and understand why your toilet is misbehaving. The most common culprit is a faulty flapper valve. This component is responsible for controlling the flow of water from the tank to the bowl, and over time, it can become worn or misaligned, leading to continuous water flow. Another possible issue could be an imbalanced float, which signals the need to refill the tank even when it isn’t necessary.

Now, let’s get started with the repair. Begin by turning off the water supply to the toilet to avoid flooding during the fix. Then, flush the toilet to empty the tank. Remove the lid and inspect the components inside. Check the flapper valve, ensuring it’s properly seated and free from any obstructions or mineral deposits. If it looks worn or damaged, replace it with a new one, making sure to get the right size for your toilet model.

Next, adjust the float, if needed. The float should sit just below the waterline when the tank is full. If it’s set too high, it will trigger the refill mechanism prematurely. Adjust the float height by bending the metal rod or turning the screw, depending on your toilet’s design.

How to Install a Ceiling Fan Safely

Ceiling fans are not just functional but also add a decorative touch to your space. Installing one can be a great DIY project, but it’s important to prioritize safety to avoid any mishaps. Whether you’re replacing an old fan or adding a new one to your room, following the correct installation process is crucial. This step-by-step guide will ensure you know how to install a ceiling fan safely and with confidence.

Before you begin, ensure you have the right tools and materials. You’ll need a ladder, a screwdriver, wire strippers, a voltage tester, and, of course, your ceiling fan. Carefully read the manufacturer’s instructions that come with the fan, as specific models might have unique requirements. It’s always better to be over-prepared than to realize you’re missing something crucial mid-installation.

Safety should always be the top priority when dealing with electrical installations. Start by turning off the power to the circuit you’ll be working on at your home’s main electrical panel. Always use a voltage tester to double-check that the power is off at the light switch and the fan’s wiring. Never skip this step, as it can prevent serious electrical shocks.

When you’re ready to begin, assemble the fan blades and any other parts according to the manufacturer’s instructions. The fan’s motor typically has a hook or bracket that will connect to a mounting bracket on the ceiling. Secure this bracket to the ceiling joist to ensure the fan is firmly supported.

The next step involves wiring the fan to the electrical box. Connect the fan’s wires to the house wires, usually color-coded for easy identification. Black wires are live and should be connected together, white wires are neutral and should also be connected, and if present, green wires are grounding wires and should be connected to a ground screw.

After proper installation, turn the power back on and test your new ceiling fan. Ensure the blades are spinning freely and there are no unusual sounds or vibrations.

By following these steps, you can enjoy the benefits of your new ceiling fan while ensuring your safety and that of your household.

Easy Guide to Fixing Garbage Disposal Problems

Even the best-maintained garbage disposals can encounter the occasional hiccup, leaving you with an unpleasant kitchen chore. Fortunately, most disposal issues are relatively easy to diagnose and fix. Whether it’s a minor clog or a jammed mechanism, a bit of troubleshooting and some simple tools can help you get your disposal back in working order swiftly.

One common issue is a clogged disposal, often caused by food waste buildup. If you notice a slow drain or a complete blockage, it’s time to grab a pair of gloves and a plunger. Start by filling the sink with a few inches of hot water, then use the plunger to create a strong suction and dislodge the clog. For tougher clogs, consider using a disposal cleaner or a natural remedy like baking soda and vinegar to break down the blockage.

If your disposal isn’t running at all, the issue might be a jammed mechanism. This can happen when a foreign object, like a piece of silverware or a hard food item, becomes lodged in the disposal’s inner workings. First, ensure the power is disconnected for safety. Next, locate the small hole at the bottom of the disposal and insert a 1/4-inch Allen wrench, turning the mechanism back and forth to free the jam.

Sometimes, a disposal may make a humming noise but not turn on. This could indicate a faulty reset button or an issue with the power supply. Start by pressing the reset button, which is usually red and located at the bottom or side of the disposal. If this doesn’t work, check your home’s circuit breaker box to ensure the disposal circuit hasn’t tripped.

Regular maintenance is key to keeping your garbage disposal in top shape. Pouring ice cubes and rock salt into the disposal and running it for 30 seconds can help sharpen the blades and break down any grease buildup.

Remember, when dealing with any appliance repair, safety should be your top priority. Always disconnect the power before attempting any fixes, and if you’re unsure about any step, consult a professional.

By familiarizing yourself with these basic troubleshooting techniques, you can handle most common garbage disposal problems with confidence. From simple clogs to jammed mechanisms, you’ll be surprised at how easy it is to get your disposal running smoothly again.

For more advanced issues, such as persistent leaks or motor problems, it’s best to seek professional assistance. Garbage disposal systems are powerful appliances, and attempting complex repairs without the necessary expertise can be dangerous.

In conclusion, taking a proactive approach to garbage disposal maintenance can save you time, money, and headaches in the long run. By addressing issues promptly and practicing proper usage, you’ll ensure your disposal remains a reliable kitchen companion for many years. So, don’t let a faulty disposal ruin your day; with a bit of knowledge and some simple tools, you can handle most minor problems with ease.

Home Plumbing Basics Every Homeowner Should Know

Your home’s plumbing system is an intricate network that, when functioning smoothly, provides the essential convenience of modern life. However, plumbing issues can be intimidating for homeowners, often leading to costly repairs or unforeseen emergencies. Familiarizing yourself with the basics of home plumbing can empower you to handle minor issues independently and recognize when professional assistance is required. Being proactive with your plumbing knowledge can save both time and money in the long run and contribute to maintaining a safe and comfortable living environment.

One of the fundamental aspects of home plumbing is the water supply system. It involves understanding the main shut-off valve, typically located near the water meter or where the water supply enters your home. Locating and knowing how to operate this valve is crucial in controlling water flow during emergencies or routine maintenance. Familiarize yourself with the various shut-off valves for individual fixtures like sinks, toilets, and washing machines to isolate specific areas for repairs without disrupting the entire water supply.

Understanding your home’s drain-waste-vent system is equally vital. This system ensures that wastewater and sewage are efficiently removed from your house while maintaining proper ventilation to prevent traps from drying out and allowing sewer gases to enter your living spaces. Regularly check for any signs of damage or blockage in the vent pipes to ensure the system functions optimally.

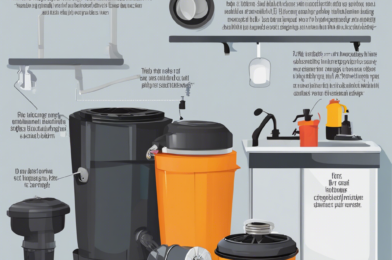
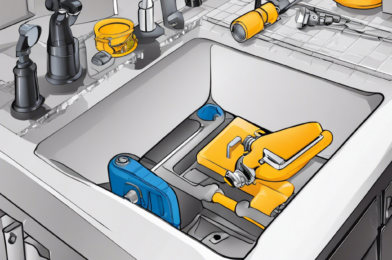
Every homeowner should also have a basic understanding of common plumbing tools and their uses. A basin wrench, for example, is indispensable for reaching the hard-to-access nuts under sinks, while a pipe wrench is essential for tightening or loosening pipes. Plungers come in various sizes and types, allowing you to unclog toilets, sinks, or showers effectively. Knowing how to use these tools can help you tackle minor issues without the need for immediate professional intervention.

Routine maintenance plays a significant role in preventing major plumbing disasters. Regularly inspect your home for signs of water damage, leaks, or corrosion. Check faucets and showerheads for drips, and replace worn-out fixtures to prevent water waste and potential damage. Consider installing water-efficient appliances and fixtures to reduce water consumption and lower utility bills.

Furthermore, being aware of potential plumbing pitfalls can save you from headaches down the line. For instance, pour oils and grease into a disposable container rather than down the drain to prevent clogs. Avoid flushing non-biodegradable items down the toilet to prevent blockages.

In conclusion, a basic understanding of home plumbing empowers homeowners to take control of their property’s well-being. By knowing the fundamentals, you can handle minor issues, conduct routine maintenance, and recognize when to call in the experts for more complex problems. This proactive approach to homeownership will ensure that your plumbing system remains reliable, efficient, and cost-effective.

Upgrade Your Light Fixtures: A Beginner’s Guide to Basic Electrical

Are you tired of dull lighting in your home? Do you feel like your space needs a little extra sparkle? It’s time to brighten things up and take matters into your own hands, literally! Upgrading your light fixtures is a brilliant way to enhance the ambiance and style of any room, and you don’t need to be an electrician to do it. With this beginner’s guide, you’ll discover that basic electrical work can be surprisingly straightforward and rewarding.

When it comes to updating your lighting, one of the easiest and most impactful changes you can make is replacing your light fixtures. Whether it’s a pendant light over your kitchen island, a chandelier in the dining room, or new wall sconces in the hallway, these fixtures serve as the jewelry of your home, adding character and personality. The best part? You don’t have to call the professionals for every little thing.

Before you begin, safety is paramount. Ensure you turn off the power to the fixture by flipping the corresponding switch on your home’s electrical panel. It’s a simple step that could prevent a shocking experience, literally! Once the power is off, you can remove the existing fixture. Typically, fixtures are held in place by a few screws, making this process easy and straightforward.

Next, it’s time to select your new light fixture. Choose one that matches your style and the overall aesthetic of the room. Contemporary, vintage, rustic, or glamorous—the options are endless! Just ensure that the new fixture is compatible with your existing electrical setup. Most fixtures come with clear installation instructions, making the process a breeze.

With your new fixture in hand, it’s time to get down to business. Install the provided mounting bracket, ensuring it’s secure and level. Then, connect the wiring, following the instructions that came with your fixture. Usually, you’ll be connecting black to black, white to white, and grounding wires, but always refer to the manufacturer’s guidelines.

This simple upgrade can transform the look and feel of your home. So, why wait? Grab your tools, and let the transformation begin!

Quick Fixes for Holes in Walls: Patch Like a Pro

So, you’ve got holes in your walls, and you’re ready to tackle the repair like a seasoned DIYer. Whether it’s from moving furniture, an enthusiastic door swing, or an energetic toddler, filling those holes can make your walls look as good as new. Don’t worry; it’s an easy fix that doesn’t require a degree in construction! With a few simple tools and some readily available materials, you’ll be patching those holes in no time.

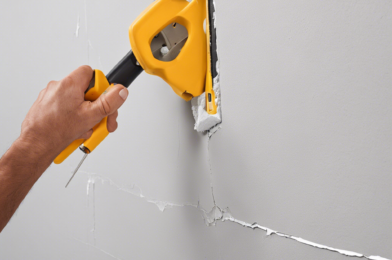
The first step is to assess the damage. Is it a small nail hole or a more significant dent? Knowing the size will help you choose the right approach. For tiny holes, a quick dab of spackling paste or drywall repair putty will do the trick. Simply apply a small amount with a putty knife, ensuring you fill the hole and create a smooth surface. Wait for it to dry, and you might be done already!

If the hole is larger, say from a doorknob impact, you’ll need a slightly more involved process. Start by cleaning the area to remove any debris. Then, apply a patch, which can be a self-adhesive mesh or a traditional drywall patch. For the latter, you’ll need to apply drywall compound (also known as joint compound or mud) over the patch, smoothing it out with a putty knife. Let it dry, and apply a second coat if needed for a seamless finish.

Once the patch is dry, lightly sand the area until it’s smooth. The goal is to create a flat surface that’s level with the rest of the wall. After sanding, you can prime and paint the patched area to match your wall color. With the right paint match, your repair will be virtually invisible!

Filling holes in walls is a straightforward process that can significantly improve the appearance of your home. By following these simple steps, you can achieve professional-looking results and feel a sense of accomplishment in your DIY endeavor.

Home Security Upgrades You Can Install Yourself

Feeling safer at home doesn’t have to involve hiring expensive contractors or investing in complex systems. You can significantly enhance your home security through simple DIY upgrades that are both effective and budget-friendly. These self-installed security solutions not only give you peace of mind but also allow you to take control of your home’s safety. From reinforcing entry points to integrating smart technology, this guide will walk you through some accessible and practical ways to secure your home.

Starting with the heart of your home’s security system, consider reinforcing your entrance. Strengthen your door’s integrity by replacing the standard screws in your door hinges and strike plate with longer ones, preferably three inches or more, to provide a more robust anchor into the door frame. Additionally, installing a door jammer or a door brace can significantly increase the resistance against forced entry. These simple, cost-effective measures can make a big difference in protecting your home.

Windows are common weak points in home security. To address this, consider installing window security film. This transparent film is applied to the interior of the glass, holding shattered fragments together in the event of breakage, thus deterring intruders. The film also offers the additional benefit of blocking harmful UV rays and reducing glare. Another simple upgrade is adding window locks or pins, which prevent the window from opening more than a few inches, ensuring ventilation without compromising safety.

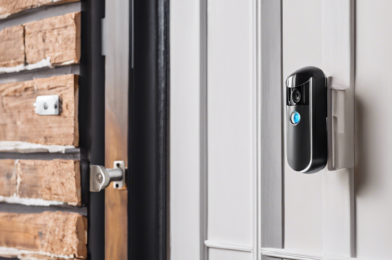
Security cameras and smart doorbells are excellent tools to deter potential intruders and monitor your home’s surroundings. Modern options offer affordable, easy-to-install systems with advanced features such as motion detection, night vision, and two-way audio. These devices often integrate with your smartphone, allowing you to monitor your property remotely, receive alerts when motion is detected, and even communicate with visitors or potential intruders.

Smart lighting systems offer a convenient and effective way to enhance security. These systems can be programmed to turn on and off at specific times, or they can be triggered by motion sensors, simulating occupancy even when you’re away. This can deter potential burglars, who often prefer breaking into unoccupied homes. Smart lights are typically easy to install, connecting directly to your home’s Wi-Fi and controllable through a user-friendly app.

Implementing these DIY security upgrades can significantly improve your home’s safety and give you a greater sense of control. The beauty of these solutions is that they are not only effective but also accessible, allowing you to take proactive steps towards protecting your home and family without breaking the bank or relying on professional services. Stay tuned for our next post, where we’ll delve into more advanced DIY security solutions for those looking to further fortify their homes.

Build Your Own Backyard Fire Pit: Weekend Project Guide

Creating a cozy fire pit in your backyard is an excellent way to enhance your outdoor living space and create a gathering spot for memorable evenings. It’s a fun DIY project that can be completed over a weekend, transforming your backyard into a captivating hangout area. Here’s a step-by-step guide to help you bring this vision to life.

**Choose a Location:** Select a spot in your backyard that’s a safe distance from any structures, trees, or other flammable materials. Ensure there are no overhead obstructions like tree branches or power lines. Leveling the ground is important for stability, and consider the direction of the wind to avoid smoke blowing into your home.

**Gather Materials:** For a basic fire pit, you’ll need concrete blocks, fire bricks, gravel, sand, and a metal fire ring. You can customize the design and materials based on your preference and budget, considering options like flagstone or pre-made steel fire pit kits.

**Dig and Prepare the Pit:** Dig a hole slightly larger than your desired pit size, ensuring it’s deep enough to accommodate the metal fire ring. Line the hole with gravel and compact it, creating a solid base. This step is crucial for drainage and stability, ensuring your fire pit will stand the test of time.

**Build the Structure:** Lay the first course of concrete blocks or fire bricks on the gravel base. Use a level to ensure they’re even, and continue stacking and leveling each course until you reach the desired height. Leave openings for fuel storage and airflow.

Home Weatherproofing: Save Money on Energy Bills

Many homeowners are seeking ways to reduce their energy costs without sacrificing comfort, especially as the colder months approach. One effective strategy is weatherproofing your home, a simple yet powerful approach to minimizing heat loss during winter and heat gain during summer. This not only reduces your carbon footprint but also results in substantial savings on your energy bills.

Weatherproofing your home is essentially like giving your house a cozy blanket, sealing all the gaps and cracks to keep the warmth inside during winter and the cool air inside during summer. This process starts with a thorough home inspection to identify areas that need attention. Look for gaps around windows and doors, as these are common culprits for heat transfer. You may also consider checking for inadequate insulation in your attic, basement, or walls, as these areas often contribute significantly to energy loss.

Begin your weatherproofing journey by caulking and sealing all the cracks and openings you find. This is a relatively inexpensive solution that can make a huge difference in your home’s energy efficiency. Weatherstripping doors and windows is another cost-effective measure that can prevent drafts and keep the temperature inside comfortable.

For windows, it’s worth considering adding storm windows for an extra layer of insulation. This additional protection can significantly decrease heat loss, ensuring your home remains toasty and warm during the colder seasons. Meanwhile, during the summer, these storm windows help keep the heat out, reducing the workload on your air conditioning system.

By implementing these weatherproofing measures, you’ll soon notice a decrease in your monthly energy bills. These small yet impactful steps will contribute to both financial savings and environmental conservation, making your home a more energy-efficient and comfortable living space.